The Blackout That Taught Me About Crisco
It was one of those Midwest storms—wind howling, trees cracking, and power lines giving up like wet spaghetti. By the time it passed, the power was out, my flashlights were dead (yeah, rookie mistake), and the only candle I had left was half-burned and buried in a junk drawer.
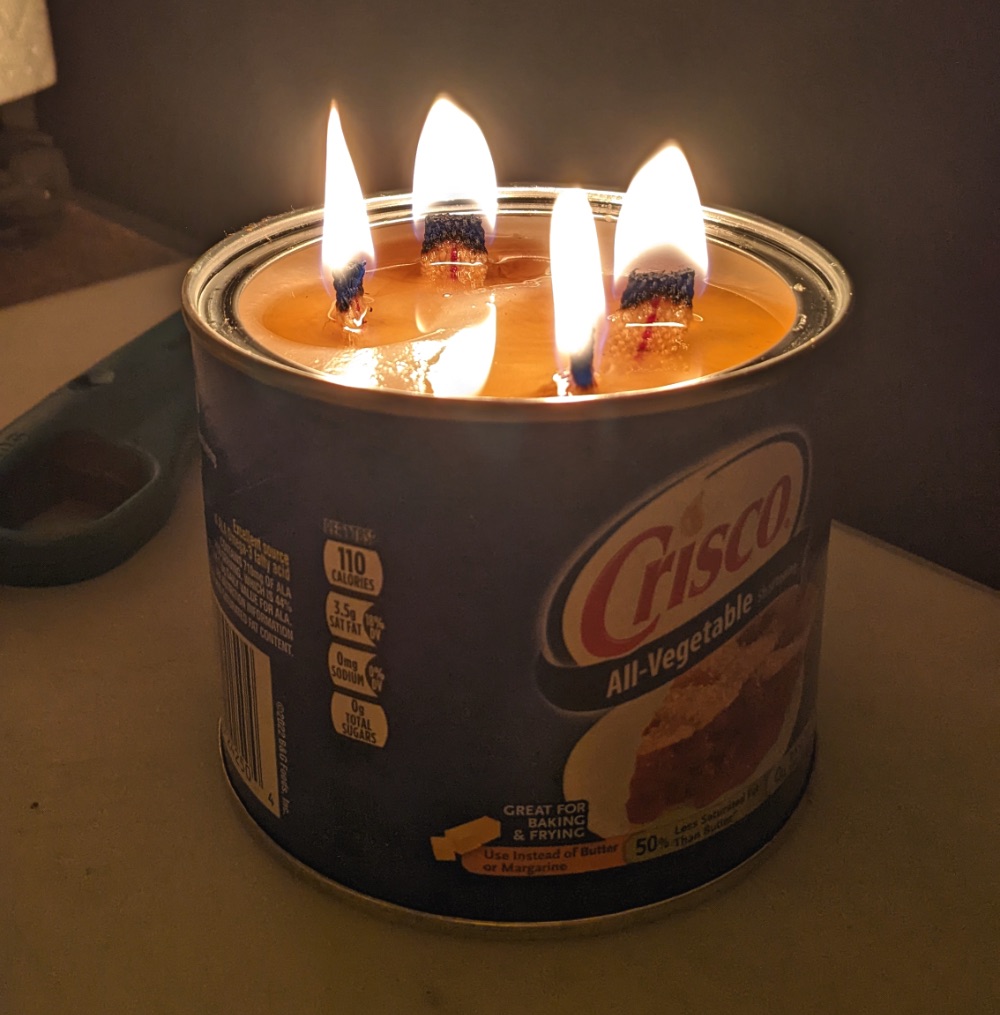
That’s when I remembered hearing somewhere—maybe an old camping forum or YouTube rabbit hole—that you could use Crisco as an emergency candle. I dug through the pantry, found a tub I’d bought a year earlier for frying fish (once), grabbed a piece of cotton string, and gave it a shot.
What happened next was honestly impressive: a calm, steady flame that lasted hours. No toxic smell, no fast burnout, no drama. Since then, I’ve never looked at a tub of shortening the same way.
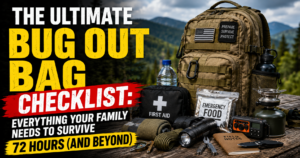
This simple trick turned into one of my favorite low-cost survival hacks, especially when prepping for power outages. If you’re into DIY prepping, this one ranks right up there with the one-cup tip for power loss and other clever ways to stay safe without breaking the bank.
Why Crisco Makes a Great Survival Candle
Let’s be real—when most folks think of Crisco, they picture biscuits or fried chicken. But behind that blue label is a goldmine of survival potential. The thing that makes it so good for frying also makes it burn slow and clean: fat. Good, old-fashioned vegetable shortening.
Here’s why I swear by Crisco emergency candles:
- Long burn time – A full can with one wick can burn for 50–70 hours depending on wick size and airflow. That’s longer than most store-bought candles.
- Non-toxic & unscented – You’re not choking on perfume or chemicals like with some candles.
- Shelf-stable – I’ve had the same tub in my emergency stash for over a year with no issues.
- Cheap – One $4 tub can make multiple survival candles.
- Easy to find – Any grocery store’s got it. No prepping specialty shop required.
Honestly, if you’re looking to stretch your emergency budget and build a reliable stash of homemade gear, Crisco is one of the most overlooked tools in the pantry.
I keep one in my storm kit right next to my mini duct tape roll and a stash of cotton ball fire starters. It’s not just about having stuff—it’s about having stuff that actually works when everything else fails.

How to Make a Crisco Emergency Candle (Step-by-Step)
I wasn’t expecting it to be this easy—but making a Crisco emergency candle takes less than five minutes, and the results are surprisingly solid. Whether you’re using the full tub or portioning it into smaller containers, this DIY setup works great for blackouts, camping, or even just prepping on a tight budget.
Here’s how I make mine:
- Start with a tub of Crisco
Any size works. I’ve used the big one-pound tub, but you can go smaller if you’re making multiple candles or want something travel-sized. - Insert a wick
I usually use a thick cotton string, butcher’s twine, or even a paper towel twisted into a rope. Stick it straight down into the center of the Crisco until it touches the bottom. - Center and support the wick
You can use a skewer, pencil, or chopstick across the top of the tub to hold the wick upright while it sets. - Optional: scoop Crisco into a smaller container
For bug-out bags or compact kits, I scoop some Crisco into a small tin can or a leftover metal mints tin and add a short wick. Works like a charm. - Light it up
Once your wick is ready and the Crisco has warmed slightly (room temp is fine), light it just like a candle. It may take a few seconds to catch, but once it does, it burns slow and steady.
Bonus Tip:
You can prep a few of these in advance, label them, and stash them in your emergency supply shelf or car kit. It’s one of those things you hope you never need—but when the lights go out and you need just a little bit of calm and light? This homemade Crisco candle is pure gold.
How Long Will a Crisco Candle Burn?
This blew my mind the first time I tested it. I lit a Crisco candle in the evening, expecting it to burn for maybe five or six hours. It was still going strong when I woke up the next morning.
Rough estimates based on size and wick type:
- Full one-pound tub – 50 to 70 hours with a single centered wick
- Small tin (about 4 oz.) – 12 to 20 hours
- Double wick setup – You’ll get more light, but the burn time will be shorter
I’ve also tried using tea light-style setups with Crisco, and they held up surprisingly well—longer than most cheap store-bought candles I’ve burned.
If you’re trying to stretch light for multiple nights during an outage or storm, one Crisco candle can easily replace several overpriced “emergency” candles off the shelf. Combine that with tips from my emergency prep guide, and you’ve got a solid lighting plan for when the grid goes down.

Is It Safe to Burn Crisco Indoors?
This was one of my first concerns when I made my own Crisco candle. I mean, burning a tub of shortening sounds like something out of a bad idea handbook, right? But after testing it during a power outage (and doing a ton of reading), I can confidently say: yes, it’s safe—if you’re smart about it.
Here’s what I’ve learned firsthand:
- Crisco burns clean
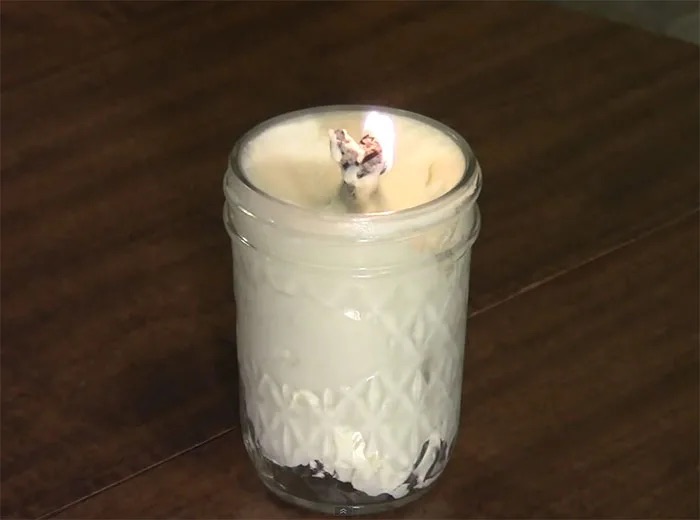
No strong odor, no visible smoke. It’s basically like burning any unscented candle—just made from fat instead of wax. - Use a stable container
If you’re scooping Crisco into a different holder, go with something metal or glass. I’ve used tin cans and small mason jars. Just avoid plastic—that’s asking for trouble. - Place it on a fire-safe surface
I always light mine on a ceramic plate or metal tray, away from curtains, paper, or anything flammable. That’s just common sense with any open flame. - Keep an eye on it
Like any candle, you don’t want to walk away and forget about it. I usually burn mine while we’re in the same room, reading or playing cards during a blackout.
I’ve used Crisco candles indoors multiple times, especially during those long winter power outages. If you’re cautious, they’re just as safe as a regular candle, and in some cases, even safer because the flame is low and steady.

Best Wicks for DIY Crisco Candles
Let’s talk wicks—because not all of them are created equal. I’ve experimented with quite a few options over the years, and while most work, some are definitely better than others when it comes to making a solid Crisco emergency candle.
Wick types I’ve tried and liked:
- Cotton string or butcher’s twine
This is my go-to. It’s easy to find, slow-burning, and holds a flame well when saturated with shortening. - Twisted paper towel or toilet paper
Surprisingly effective. Just twist tightly and make sure the tip is dry before lighting. - Braided cotton strips
If you want a thicker, longer-lasting wick, braid three strips of cotton cloth together. Burns steady and tall. - Store-bought candle wicks
If you want the most predictable results, grab a bag of cotton candle wicks with metal bases. I’ve used these in Crisco poured into small jars, and they work perfectly.
The key is making sure your wick is secure and tall enough above the Crisco so the flame has room to breathe. And remember—once the candle starts burning and the Crisco softens, you can always reposition the wick if needed.
Wicks are cheap and easy to experiment with, and once you get the hang of it, you’ll never look at leftover string the same way again.
Make a Travel-Sized Crisco Candle Kit
Once I realized how well Crisco candles work, I wanted to take the idea a step further—how could I turn this into something portable? The full-size tub is great for home use during blackouts, but what about the woods, the truck, or my bug-out bag?
That’s when I started putting together travel-sized Crisco candle kits, and they’ve honestly been one of the most useful additions to my emergency setups.
Here’s how I make mine:
- Scoop a few ounces of Crisco into a small metal tin
Altoids tins, small tuna cans, or leftover tea light holders work great. You can even clean out an old makeup container if it’s heat-safe. - Add a pre-made wick
I usually prep a few short cotton wicks in advance and tuck one right in the center. If you’re worried about spills, wrap it with a bit of plastic wrap before packing it. - Seal it up tight
Once it’s filled and wicked, close the lid or tape foil over the top. You can even wrap the whole tin in duct tape for extra insulation and to give yourself an extra survival tool. - Label it and stash it
I keep one in my car’s emergency box, another in my camping bin, and one more inside my main bug-out bag. They weigh next to nothing but bring a ton of value.
Pairing one of these mini Crisco candles with a basic survival kit gives you reliable light, heat, and comfort—all from something you probably already have in your pantry. And if you’ve ever been stuck without light in a rural area at night, you know how much just one flame can mean.

How Crisco Candles Compare to Store-Bought Emergency Candles
Now, I’m not knocking store-bought candles. I’ve got a few in my gear bin. But after testing both side by side, Crisco emergency candles hold their own—and then some.
Here’s how they stack up:
Burn time:
- Crisco burns longer—especially per ounce. A full tub can last over 50 hours, while most emergency candles max out around 8–10.
Cost:
- A tub of Crisco can make 4–6 good-sized candles for under $5. Compare that to emergency candles that cost $10+ for just a couple.
Smell & smoke:
- Crisco burns clean, especially if you use a good wick. No weird paraffin fumes or cheap wax odor.
Storage life:
- Both store well, but Crisco has an edge—it’s multi-use. If you don’t need a candle, you can still cook with it in a pinch.
Custom size:
- With Crisco, you choose the container size. Big, small, whatever your kit needs.
So yeah, while I won’t toss my store-bought candles just yet, I reach for my homemade Crisco ones first every time. They work, they last, and they’re dirt cheap. And that’s exactly the kind of survival gear I want in my kit.
Don’t Underestimate What’s in Your Pantry
If you told me years ago that a tub of Crisco would become part of my emergency gear, I would’ve laughed. But now? It’s a go-to item in my blackout kit, my camping gear, and even my bug-out bag. There’s just something incredibly satisfying about taking a basic grocery item and turning it into a reliable survival tool.
The truth is, Crisco emergency candles aren’t just a clever hack—they’re a practical, real-world solution. They’re easy to make, safe to burn indoors, and last way longer than most “survival” candles marketed online. Plus, they give off that steady, calming glow you need when everything around you feels uncertain.
I’ve lit these during storms, power outages, and late-night campsite cookouts. They’ve never let me down. And once you try it for yourself, you’ll probably end up adding a tub of Crisco to your prep shelf permanently—right next to your duct tape and cotton ball fire starters.
Next time you’re at the store, skip the overpriced emergency candles and grab a tub of shortening instead. It might not look like much—but when the lights go out, you’ll be glad you did.
As an Amazon Associate we earn from qualifying purchases through some links in our articles.